Purchase Order Workflow
Overview
Purchase orders let you order products from your vendors, track what you receive, and update your inventory automatically. Instead of running a sale, you're running a purchase — but the process feels familiar. You add items to a list, just like ringing up a customer, except the items come from your vendor instead of going to one.
This guide walks through the full purchase order lifecycle: creating the order, adding items, receiving what arrives, and closing it out.
Creating a Purchase Order
To create a purchase order, start a new order and choose the Purchase Order transaction type. You can change the type from the Sale or Transaction Type button on the toolbar, or select it when creating a new order.
Once in purchase order mode, you will notice the interface changes:
- Payment buttons (Cash, Credit, etc.) disappear — you are not running a sale.
- Purchase order–specific buttons appear, such as Receive Items, Shopping List, Print Labels, and Edit Selected.
- The layout rearranges to give more room for your item list.
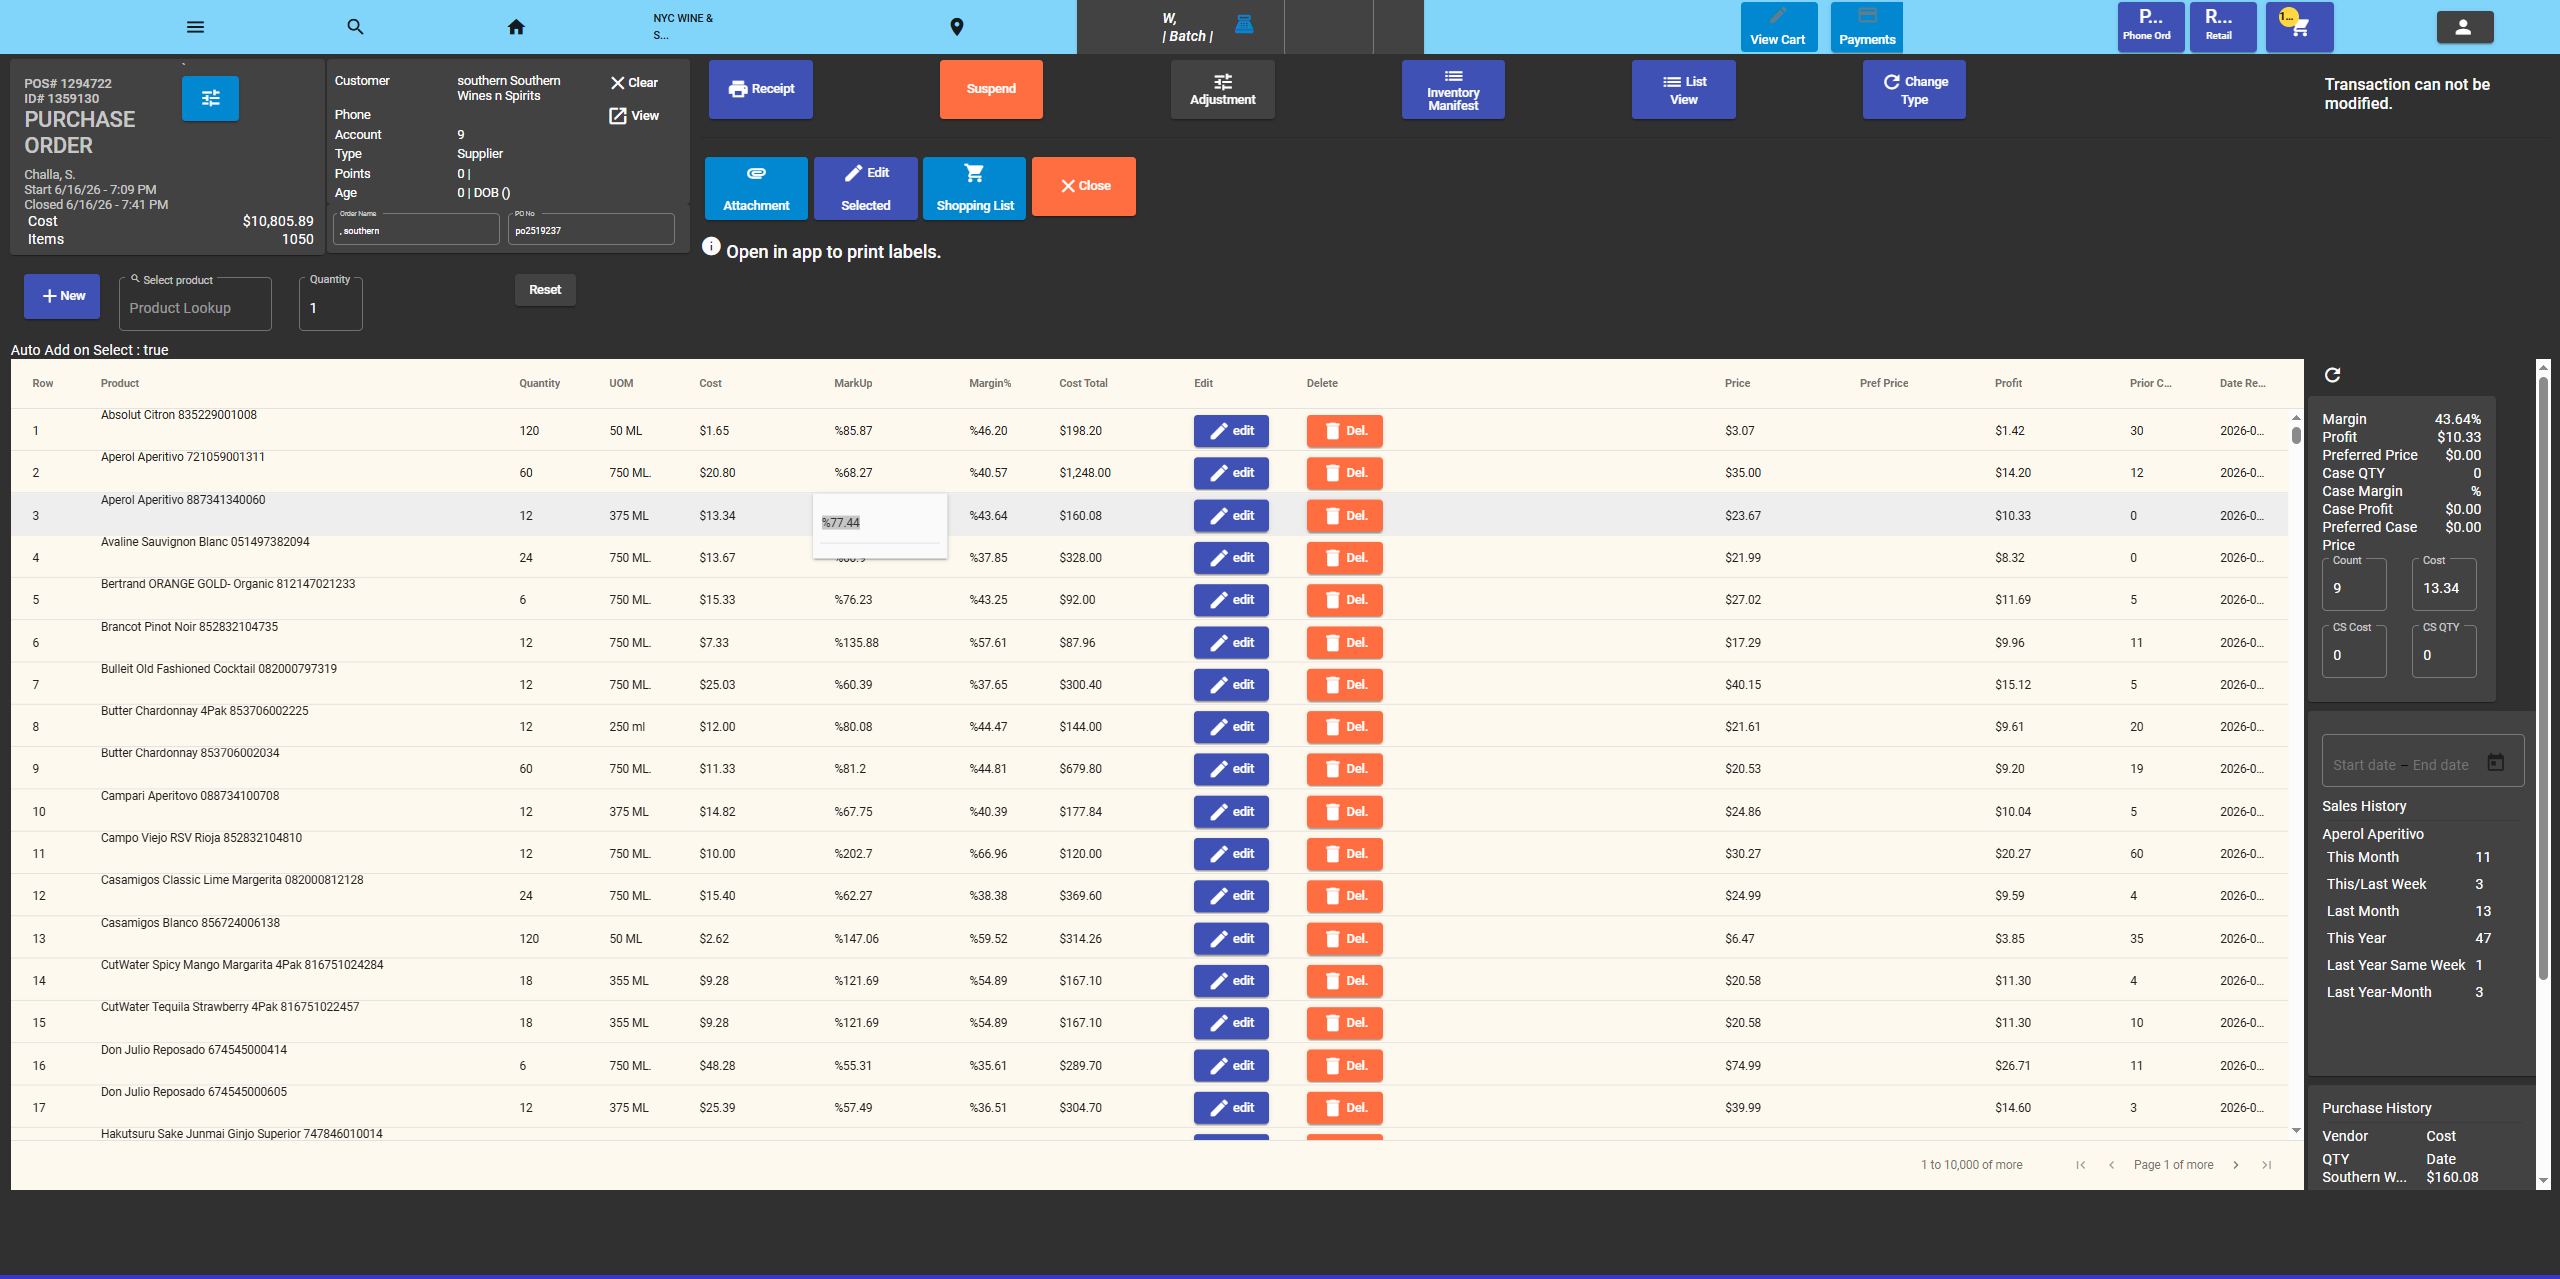
Entering PO Details
At the top of the order screen, you will see the order header. In purchase order mode, two fields are available:
- Order Name — A general name or description for the order.
- PO Number — The purchase order number, which appears only in purchase order mode. Enter your vendor's PO number or your own internal tracking number here. This field is saved to the order and can be used in reports.
Note: The PO Number field is only visible to admin and manager accounts.
Selecting a Vendor
In the order header, use the customer search box to look up and assign a vendor. In the system, vendors are stored as clients or contacts. When you search, you will see existing vendor names just like you would see customer names during a regular sale.
Once you assign a vendor:
- Their name, phone number, and account details display in the header.
- You can view or edit the vendor record by clicking the View button.
- You can clear the vendor by clicking Clear.
You can also create a new vendor record by clicking the New button next to the search box.
Adding Items
There are several ways to add items to your purchase order:
Adding Items Manually
Use the New Item entry field at the top of the item list. Start typing a product name or scan its barcode, then set the quantity you want to order. The item is added to your purchase order list.
Importing Items from CSV
If you have a product list from your vendor, you can import it using the CSV Import tool. This is available in the helper panel on the right side of the screen. Upload a CSV file with your product data, and the items will be loaded into the order.
Shopping List View
Click the Shopping List button to open a view of all the items on your purchase order. This is useful when you are in a warehouse or store, comparing what you ordered against what is physically available. From this view you can:
- Review item quantities and details
- Edit selected items in bulk (requires Edit Product authorization)
- Look up purchase history for individual items
Viewing Purchase and Sales History
For items on your purchase order, you can view their purchase history and sales history from the helper panel. This shows past purchase costs and sales data, helping you decide how much to order. A date range filter lets you narrow the history to a specific period.
Managing Your Order
Several tools are available to manage your purchase order before and during receipt:
Attachments
You can attach files to your purchase order. Click the Attachment button to upload documents such as vendor invoices, delivery confirmations, or photos. Existing attachments appear as a list of clickable links. You can add additional attachments or remove ones you no longer need.
Print Labels
If you use barcode labels for inventory, you can print them directly from the purchase order. Click Print Labels to open the label printer. Select the item and configure the label details, including the Bay Name and Bay Section for storage location. Labels are printed using ZPL-compatible printers.
Note: Label printing requires the Pointless POS mobile app. A notice will appear if you are trying to print from a web browser.
Edit Item
Click Edit Item to modify product details such as bay location directly from the purchase order screen.
Bill On Hold
If you want to receive items but defer processing, click Bill On Hold. This flags the order so it will not be processed until you are ready. While on hold, you cannot add new items to the order.
Drop Zero Quantity Items
If items on your order have a quantity of zero (for example, products you decided not to receive), click Drop 0 QTY to remove them from the order list.
Email the Order
You can email a copy of your purchase order directly from the order screen. This is useful for sending the order details to your vendor or keeping a record.
Receiving Items
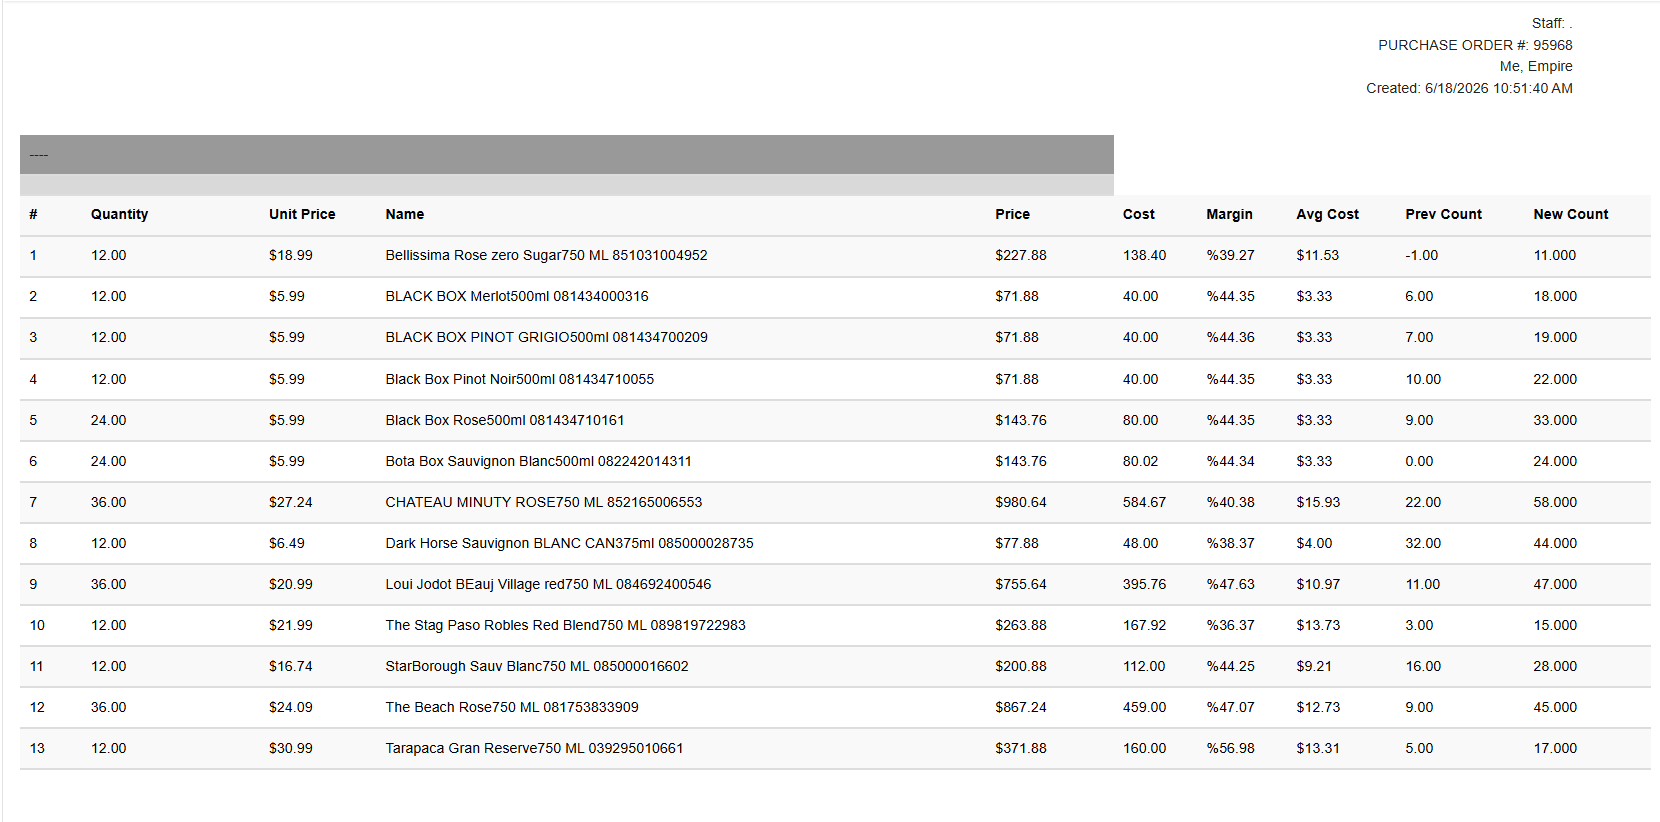
When your order arrives, click Receive Items. This action:
- Creates a manifest from the purchase order items.
- Opens the manifest form where you can confirm or adjust received quantities.
- Updates your inventory with the received products.
- Closes the purchase order.
The manifest links the products you received to your inventory, so stock levels are updated automatically.
Closing the Order
When the purchase order is complete, you can close it using the Close button. This finalizes the order and removes it from the active order screen.
Alternatively, clicking Receive Items will close the order automatically after the manifest is created.
Summary
| Step | Action |
|---|---|
| Create | Start a new order and choose Purchase Order type |
| Identify | Enter the PO Number and assign a vendor |
| Add Items | Enter items manually, scan barcodes, or import from CSV |
| Review | Use Shopping List view and purchase history to verify quantities |
| Organize | Print labels, attach documents, set bay locations |
| Receive | Click Receive Items to create a manifest and update inventory |
| Close | Use the Close button to finalize the order |